An ESP32 project is most useful when it solves a small, specific problem and survives past the first weekend. The board gives you Wi-Fi, Bluetooth, enough GPIO for real sensors and actuators, and a large ecosystem of firmware and libraries. In this article I focus on project ideas that are actually worth building, what each one teaches you, and how to avoid the usual traps around power, wiring, and security.
The parts that decide whether the build succeeds
- The ESP32 is strongest when the project needs wireless connectivity, sensor inputs, and simple automation in one low-cost board.
- The best IoT builds are usually the boring ones that measure, alert, or control something useful every day.
- In the UK, a basic dev board often costs about £8-15, while a finished project usually lands closer to £20-60 once you add sensors, power, and an enclosure.
- Local control matters more than many beginners think, especially if you want speed, privacy, and fewer cloud dependencies.
- Battery-powered devices need sleep modes and careful network timing; always-on Wi-Fi can drain a project far too quickly.
Why the ESP32 keeps winning in IoT builds
Espressif describes the ESP32 as a feature-rich SoC with integrated Wi-Fi and Bluetooth, and that combination is still the reason it shows up in so many practical IoT builds. I care less about the headline specs than about the way the chip combines connectivity, GPIO, timers, PWM, and enough headroom to handle a small web interface or messaging stack without feeling cramped.
That matters because most IoT projects are not really about raw compute. They are about getting data off a sensor, sending it somewhere useful, and reacting to it with a light, relay, buzzer, display, or notification. The ESP32 sits in the sweet spot for that job: cheap enough to deploy more than one, capable enough to feel flexible, and common enough that the tooling is mature.
For me, the real appeal is that the platform scales from a one-room temperature monitor to a small local automation node without forcing a redesign. That is why the same board keeps appearing in home dashboards, energy monitors, garden sensors, and access-control prototypes. Once you see the board as a practical connectivity layer rather than just a microcontroller, the project ideas become easier to evaluate.
That mix matters, because the next question is not what the chip can do, but which job deserves your first weekend.
Project ideas that are worth finishing, not just wiring up
If I were starting from scratch, I would choose ideas that teach one core skill and solve one visible problem. That keeps the build realistic and gives you a reason to finish the enclosure, firmware, and wiring instead of stopping at a breadboard demo.
| Project | What it teaches | Why I rate it highly | Typical difficulty |
|---|---|---|---|
| Room climate monitor | Sensor reading, calibration, display logic, alerts | Useful every day and easy to expand later | Low |
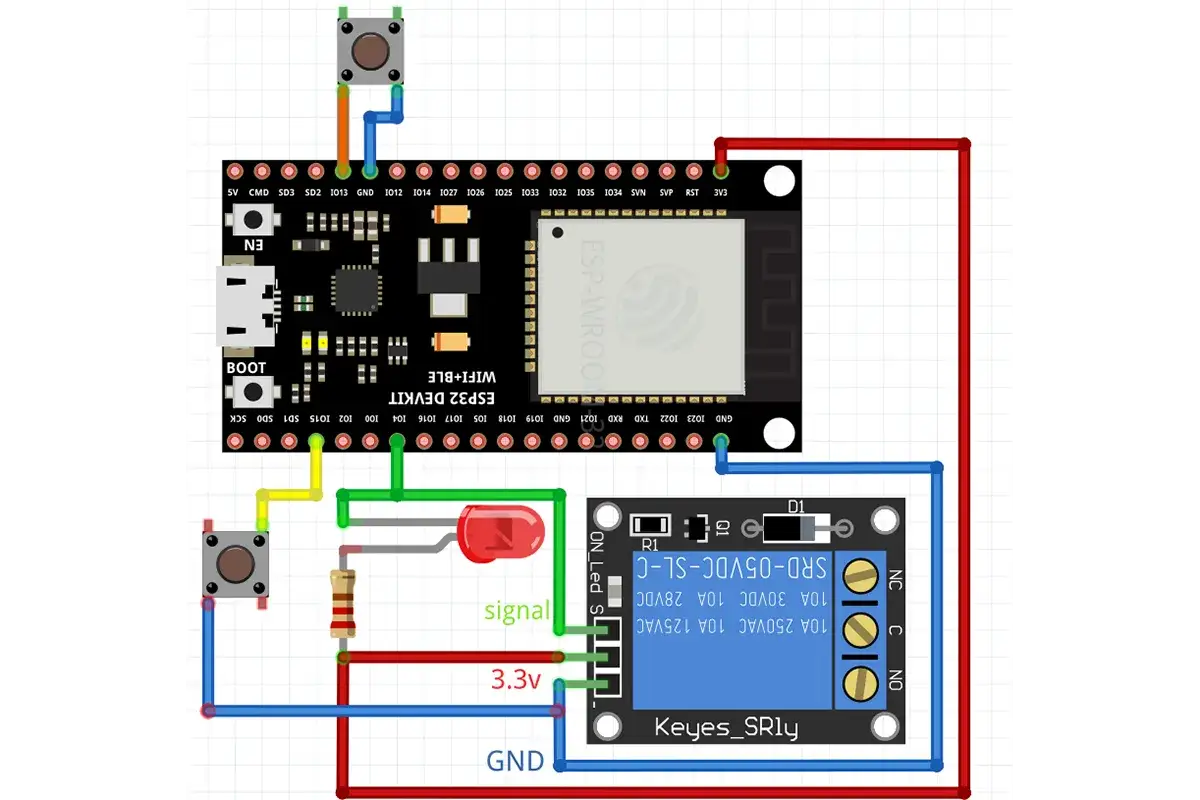
| Energy or plug-load monitor | Current sensing, data logging, thresholds | Strong practical value for UK homes and offices | Medium |
| Presence-aware lighting controller | Motion detection, relay or LED control, automation rules | Feels smart without needing complicated firmware | Low to medium |
| Leak or flood alarm | Simple thresholding, notifications, fail-safe behaviour | Cheap to build and genuinely useful in kitchens or utility rooms | Low |
| Outdoor weather node | Battery strategy, weatherproofing, low-power design | Forces you to think beyond the bench and into real deployment | Medium |
Room climate monitor
This is the first build I would recommend to most people. A temperature and humidity node teaches the basics without dragging mains voltage or complex mechanics into the mix, and the result is immediately useful in a bedroom, office, greenhouse, or nursery. Add a small OLED or e-paper screen and you get a local display that works even when the network is down.
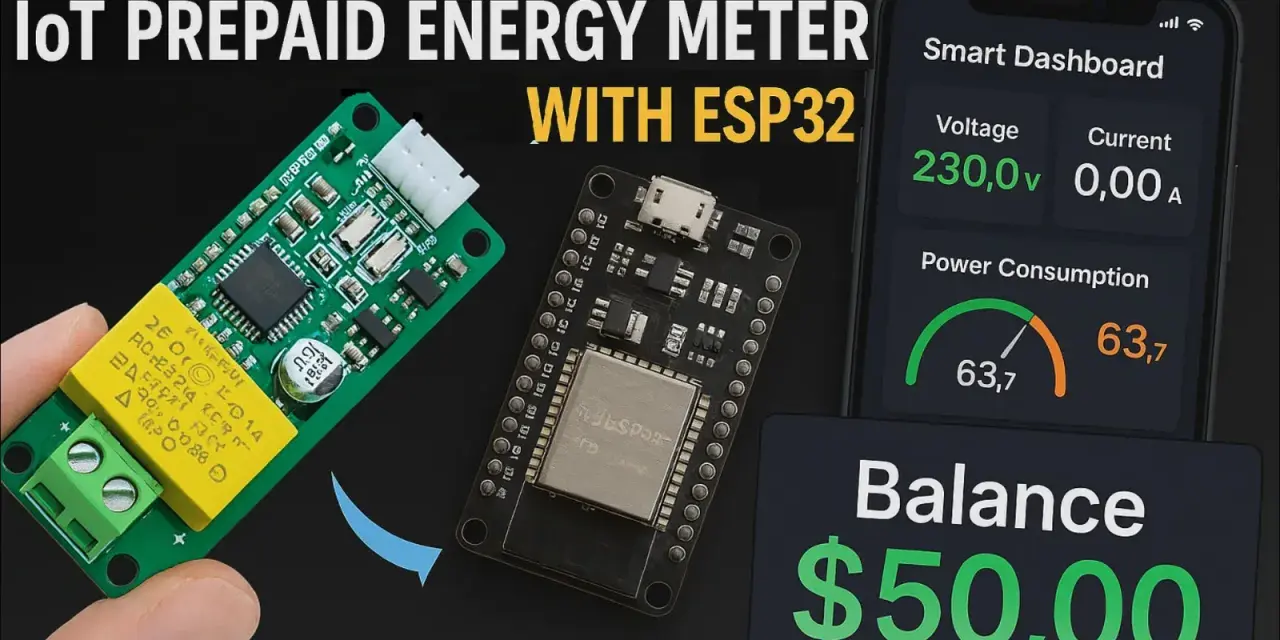
Energy or plug-load monitor
This is one of the most valuable IoT projects because it turns invisible behaviour into something you can act on. In the UK, it makes particular sense for checking standby loads, old appliances, desk setups, and heating-adjacent equipment. If the goal is to reduce waste, I would rather build this than another novelty dashboard.
Presence-aware lighting controller
A motion-triggered light is a simple build, but it teaches good habits fast: state handling, timing, false-trigger suppression, and fail-safe defaults. The key is to make the behaviour feel natural, not twitchy. A light that comes on too late or turns off too early is worse than no automation at all.
Leak or flood alarm
This is a small project with a surprisingly high payoff. A leak sensor under a sink or near a washing machine can send a local alert long before damage becomes expensive. I like these builds because they force you to think about placement, enclosure design, and notification reliability rather than just about code.
Read Also: Smart Home Automation Ideas - Make Your UK Home Smarter
Outdoor weather node
Outdoor builds are where low-power design becomes real. You have to think about battery life, Wi-Fi wake-up timing, enclosure sealing, and sensor placement. That makes this a great next-step project once you have already built something indoor and want to test your skills in harsher conditions.
If I had to choose just one of these for a first serious build, I would pick the climate monitor or leak alarm. Both are simple enough to finish and useful enough that you will keep improving them, which is exactly what a good IoT project should do. From there, the next decision is matching the idea to your goals instead of forcing every board to solve every problem.
How I would choose the right build for your goal
The mistake I see most often is starting with the flashiest idea instead of the most suitable one. The right choice depends on whether you want to learn basic firmware, improve a room, reduce energy waste, build a battery device, or add something to a local automation system.
| Your goal | Best starting idea | Why it works |
|---|---|---|
| Learn the platform quickly | Room climate monitor with a small display | Simple wiring, visible results, and enough complexity to be educational |
| Make your home more useful | Presence-aware lighting or leak alarm | Both solve a real household problem without needing a huge system |
| Cut wasted energy | Energy or plug-load monitor | Data is easy to interpret and the payoff is easy to measure |
| Build something privacy-friendly | Local sensor node with on-device alerts | You can keep the system off the cloud and still make it useful |
| Practice low-power design | Outdoor sensor node | Forces you to think about sleep modes, enclosure design, and duty cycles |
I would avoid starting with a camera doorbell, a mains-controlled heating system, or anything that needs a polished mobile app from day one. Those projects are absolutely possible, but they stack too many unknowns on top of each other. A better approach is to finish one small device, understand where the friction is, and then move to the more ambitious version with a clearer picture of the trade-offs.
That is especially true if you want to deploy the device in a real home or office, because the next constraint is not firmware logic but the actual parts, enclosure, and power path.
What I would budget for in the UK
For a prototype, I would treat the board price as the least interesting number in the build. A cheap ESP32 board may only be part of the story; the real cost appears when you add the sensor, a stable power supply, headers, wiring, and an enclosure that does not look improvised.
| Item | Realistic UK price | What to watch for |
|---|---|---|
| ESP32 development board | £8-15 | Cheap clones can be fine for prototypes, but check USB quality and power stability |
| Basic sensor module | £2-10 | Temperature, humidity, motion, light, or contact sensors are usually inexpensive |
| Small display | £3-12 | OLEDs are easy to read; e-paper is better for low power |
| Relay or MOSFET module | £2-8 | Use the right driver for the load instead of forcing a generic relay board to fit everything |
| Power supply | £5-12 | Do not underbuy this part; noisy power causes a surprising number of fake software bugs |
| Enclosure and mounting | £6-20 | The enclosure is what turns a demo into something you can leave in a room |
That puts a clean indoor build in the rough £20-60 range in many cases, and more if you want a nicer enclosure or a more specialised sensor. If you are touching 230V mains, I would budget more for safety, certified parts, and a proper enclosure rather than trying to shave a few pounds off a critical component. On UK projects, that is not a place where I would optimise for the lowest possible bill of materials.
Once the hardware budget is sensible, the next question is how the device should talk to the rest of your system without becoming fragile or hard to maintain.
Connectivity and security choices that make the build dependable
This is where many IoT projects either become genuinely useful or quietly turn into maintenance debt. I want the device to be easy to update, hard to break, and not dependent on a cloud account unless there is a clear reason for that dependency.
For a single dashboard or simple control page, HTTP can be enough. For a house full of sensors, I prefer MQTT because it keeps devices loosely coupled and avoids forcing every node to know too much about every other node. If the project needs nearby setup or pairing, Bluetooth is still useful for provisioning and short-range configuration.
- Keep local control first so the device still works when the internet is slow or unavailable.
- Use unique credentials and authenticated updates instead of shipping one shared password across multiple boards.
- Plan OTA updates early so you do not need to unscrew the enclosure for every firmware change.
- Use sleep modes deliberately if the device runs on battery; waking only to sample and transmit can change the whole power budget.
- Document a fallback mode in case Wi-Fi drops, because hardware that fails silently is harder to trust than hardware that degrades gracefully.
When I want a faster route from hardware to a usable smart-home node, I look for tools that reduce boilerplate without hiding the important choices. Home Assistant is a strong fit when the goal is local automation and privacy, while a YAML-first firmware stack can be a good shortcut if you do not want to write every integration from scratch. The important part is still the same: keep the system understandable enough that you can maintain it six months later.
That leads directly to the mistakes that make good hardware feel disappointing in practice.
The mistakes I see in ESP32 builds most often
Most weak builds are not weak because the ESP32 is wrong for the job. They are weak because the project started with too many assumptions and too little attention to the boring parts that keep devices stable.
- Starting with too much hardware turns a simple idea into a wiring problem before the firmware even works.
- Ignoring power budget makes battery devices look great on paper and fail quickly in real use.
- Leaving mains wiring on a breadboard is unsafe and not a serious deployment strategy.
- Skipping calibration makes temperature, humidity, and current readings look precise when they are not.
- Using cloud services as a crutch can create a dependency that is annoying now and painful later.
- Forgetting the enclosure means the device never really graduates from a bench prototype.
The one I see most often is the calibration issue. A noisy ADC reading is not automatically a software bug, and a temperature offset is not solved by refreshing a dashboard. In practice, good sensor work is a mix of placement, filtering, and honest expectations about what the measurement can and cannot tell you.
Once those mistakes are out of the way, the project stops being a demo and starts becoming something you actually trust.
The fastest route from concept to a device you will actually keep
If I were building this for real, I would keep the first version narrow: one ESP32 board, one sensor, one clear output, and one simple way to view the data. I would finish the enclosure sooner than feels necessary, because that is the point where the project starts behaving like a product instead of a prototype.
After that, I would add only the features that solve a real problem: a second sensor if the reading is ambiguous, a relay if control matters, an alert if the state can become urgent, or an OTA path if maintenance would otherwise be awkward. That sequence is slower than piling on features at the start, but it produces a better result and a cleaner understanding of why the build works.
For a first serious build in the UK, I would personally choose a room climate monitor or energy node, keep it local, and spend more time on the power path and enclosure than on flashy extras. That gives you a useful IoT device, a clear path to improvement, and a much better foundation for the next ESP32 build you decide to tackle.